Description
Magazines, catalogs and brochures are essential and effective tools for communication. After all, what is more interactive than turning a physical page?
At Fox Press, we provide saddle-stitched and custom printed catalogs, booklets, magazines and calendars at an affordable price to put the power of the printed word in your hands. Choose from a variety of papers, finishes and sizes to create the perfect saddle-stitched booklet to communicate your products, services or ideas.
Ordering Information
- Paper is printed and folded in the middle to create the booklet
- Good for booklets at or under 80 pages
- Two staples are added to hold printed sheets together
- Saddle-stitched books are a cost effective and high-quality product
Saddle-Stitched Books
instant price quote
Choose Your Product Options:

Have Artwork to Upload?
Files may be uploaded at any time after placing your order.
Why Fox Press?
SADDLE-STITCHED BOOKS ARE KIND OF OUR THING.
Custom printed catalogs, magazines, booklets and calendars are the foundation of Fox Press. We offer fast production times, high quality printing and killer customer service.
DESIGN TROUBLE?
If you need help with design, just let us know. Our in-house artists are available to assist whether you just need a little guidance or complete design services.
WE’RE HERE TO HELP.
When you submit your file for printing, we don’t just blindly press the print button. Our pre-production department reviews your file to make sure that what you’ve designed will print correctly. Next, you’ll get an online proof to make sure that everything is up to your standards before we get started with production.
IT MATTERS TO YOU? IT MATTERS TO US!
You’ve spent a lot of your time and energy getting your project ready to print. On the flip side, we spend our time and expertise to make sure that your project is produced quickly and at the highest quality. If the product doesn’t meet your expectations, we’ll make it right with a reprint or full refund. It’s all in our terms and conditions.
Specifications
Preferred File Format: We prefer print-ready PDF files. Here’s why: If you produce a print-ready PDF file with the fonts embedded, what you see on your screen will be very close to what you’ll see on the printed page.
Accepted File Formats: We can accept the following file formats: .pdf, .doc, .jpg, .png, .tiff, .psd, .pub, .ppt, .ai
Fonts: Flatten document files before you submitting. If you use a font in your design that is not in our library, there is a chance that the font you chose may be replaced by a system font.
Color Space: RGB color space is used for computer monitors and the internet only. CMYK colorspace is used in print production. If you design in RGB your files will have to convert to CMYK, which may cause color shifts. Best practice is to design using the CMYK colorspace.
Resolution: Dots per square inch (DPI) is a measurement of how much information is included in an image. Images should have a resolution of 300 dpi. Images with a DPI of less than 150 will print with pixelization. Low resolution errors and warnings will be identified on your print production proof. Please pay close attention to these warnings as they may affect the quality of the final product.
Templates
Product FAQ
-
Saddle-stitching involves folding sheets of paper in half and stapling them along the fold, making it ideal for publications like brochures, magazines, and catalogs with up to 80 pages. It is cost-effective and allows the booklet to lay flat when open, but it offers a less durable and polished appearance compared to perfect binding. Perfect binding involves gluing the edges of the pages together along the spine and attaching a wrap-around cover, resulting in a smooth, square spine. This method is suitable for thicker publications and those looking for a more professional and durable finish for their book.
-
The highest number of pages for a saddle-stitched book is around 80 pages. This limitation is due to the binding method, where sheets of paper are folded and stapled along the spine. As the page count increases, the booklet becomes thicker, making it difficult for the staples to securely hold the pages together. Additionally, a higher page count can cause the booklet to not lay flat on a table and appear bulky. For publications exceeding this page limit, alternative binding methods like perfect binding are recommended to ensure durability and a professional finish.
-
Saddle-stitched books must have pages in multiples of four because of the way they are constructed. Each sheet of paper in a saddle-stitched booklet is folded in half, creating four pages: two on the front and two on the back. When multiple sheets are nested together and stapled along the fold, this configuration ensures that the pages are sequential and correctly aligned. If the total page count is not a multiple of four, the last sheet will be incomplete, resulting in blank or unusable pages. Therefore, to maintain proper pagination and ensure your book looks its best, saddle-stitched booklets adhere to this page multiple requirement.
More Information
STEPS TO MAKING A SADDLE-STITCHED BOOKLET
Saddle-stitched booklets are held together by staples (or stitches) along the fold of the pages, making them an ideal choice for small booklets, brochures, and catalogs. If you’re interested in dipping your toes into publication or simply stuck somewhere in the creative process, this guide is for you!
Step 1: Define Your Purpose and Audience
Before you start writing, it’s essential to determine your intended audience and how to make your booklet appealing to them. Are you creating a product catalog, an event program or an informational guide? The tone you’d expect from a travel magazine is very different from that of a funeral pamphlet, so make sure the style and content of your booklet suits your audience.
Step 2: Plan Your Content
Outline the structure of your booklet. Divide it into sections or chapters if necessary. Plan the key points you want to cover in each section and block out space for any images, graphics or other visual elements you’ll need. This outline will provide a baseline for design down the line and help ensure that your booklet flows logically.
Step 3: Write the Content
Start writing the content based on your outline. For general advice in copywriting, it’s a good idea to keep your sentences clear and concise. Use headings and subheadings to break up the text and make it easier to read. Bullet points are also effective for organizing dense lists of information. Remember to proofread your text to correct any errors and ensure clarity.
Step 4: Design the Layout
The layout of your booklet is crucial for readability and visual appeal. Use software like Adobe InDesign, Scribus or even Microsoft Word to design your layout. Make sure to keep your page count at or below 64, as the staples that hold saddle-stitched books cannot hold many more pages together than this. Also ensure that your final page count is a multiple of four, otherwise some pages must be left blank due to the saddle-stitching manufacturing process. Next, set up your document with the correct page size and margins. While we at Fox Press offer printing for a wide array of different sizes, the most common sizes for booklets are 5.5” x 8.5” or 8.5” x 11”.
Step 5: Add Visual Elements
Incorporate images and graphics in the spaces you blocked out in the outline. Make sure that all the visuals you use are high-resolution, with a dots per square inch (DPI) measurement of 300. If the DPI is too little, the images will look pixelated when printed. Stick to a consistent style for images and graphics in order to maintain a professional look.
Step 6: Choose Fonts and Colors
Select fonts that are easy to read. Typically, a sans-serif font is used for headings, and a serif font is used for body text. Maintain a consistent color scheme throughout the booklet. Use colors that align with your brand or the theme of the booklet. Additionally, make sure to flatten your document file before you send it to print, otherwise your saved fonts might revert to system fonts.
Step 7: Arrange Pages for Printing
For saddle-stitch binding, pages need to be arranged in a specific order called imposition. This means that the pages are printed on large sheets of paper, which are then folded and stapled together. Use your design software to set up the correct imposition. Most software has templates or plugins that can assist with this.
Step 8: Print and Assemble
Once your design is complete, it’s time to print your booklet. You can print it at home for a rough idea of a professional-looking product, but for higher quality, consider using a printing service. We at Fox Press are happy to help with that.
Step 9: Review and Finalize
After assembling your booklet, review it carefully. Check for any printing errors, misaligned pages, etc. Make any necessary adjustments and create a final file version.
Step 10: Send Your Saddle-Stitched Book to Fox Press!
We’ll make sure you get your order on time and looking its best.
We're here for you!
Call: 1-877-329-0578
Email: info@foxpress.com
In a Super Rush?
Same Day Service is available. Reach out to Customer Service for more info.
Design Services are at your fingertips.
Our talented team of graphic designers are ready to help you create something great. Contact a Designer today.
$1.00
We're here for you!
Call: 1-877-329-0578
Email: info@foxpress.com
In a Super Rush?
Same Day Service is available. Reach out to Customer Service for more info.
$1.00
$1.00


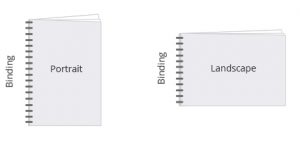 Long Edge Binding Short Edge Binding
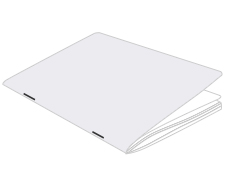 Saddle Stitched
 Choose the color option for the inside pages of your cover.